LSU Calendar
In January, 2019, LSU launched a new events calendar through a product called Localist.
The new calendar has several advantages over the previous solution:
- simplified user interface and improved unit-level event management tools;
- improved, responsive design;
- improved event search and event promotion tools;
- meets the university's accessibility requirements
The events calendar can be viewed at calendar.lsu.edu and a link can be found in the footer of the LSU homepage. Units wishing to establish unit-specific feeds on websites, should contact the calendar administrator or a member of the web support team.
If you have any questions about using Localist or need help with an event submission, contact lsucalendar@lsu.edu for assistance.
Calendar Requirements
All university sponsored events must be entered into the events calendar, even if a unit chooses to use a separate calendar solution for unit-specific purposes. Advantages of adding all events to a single calendar solution include:
- Enables university administration and the LSU Emergency Operations Center to see all scheduled LSU events and determine which ones may need to be canceled, postponed, or rescheduled if the university has to close unexpectedly due to extreme weather or an emergency situation.
- Provides the LSU community with a streamlined way to look for activities to attend and to publicize those activities to others.
User Permission Levels
There are several user permission levels that grant different levels of access to the calendar and its functions. All users will start off at the basic user level, which enables them to log in to Localist and submit events for approval. The Division of Strategic Communications will work with individual units on campus to further determine appropriate user roles for employees.
No permission level is required to view the calendar. Anyone can view the calendar by visiting calendar.lsu.edu.
Entering Events
- Visit the event submission link, which will be provided to you by the LSU Calendar Administrator. You will be prompted to log in with myLSU.
- Enter the event name and a description. These fields are required.
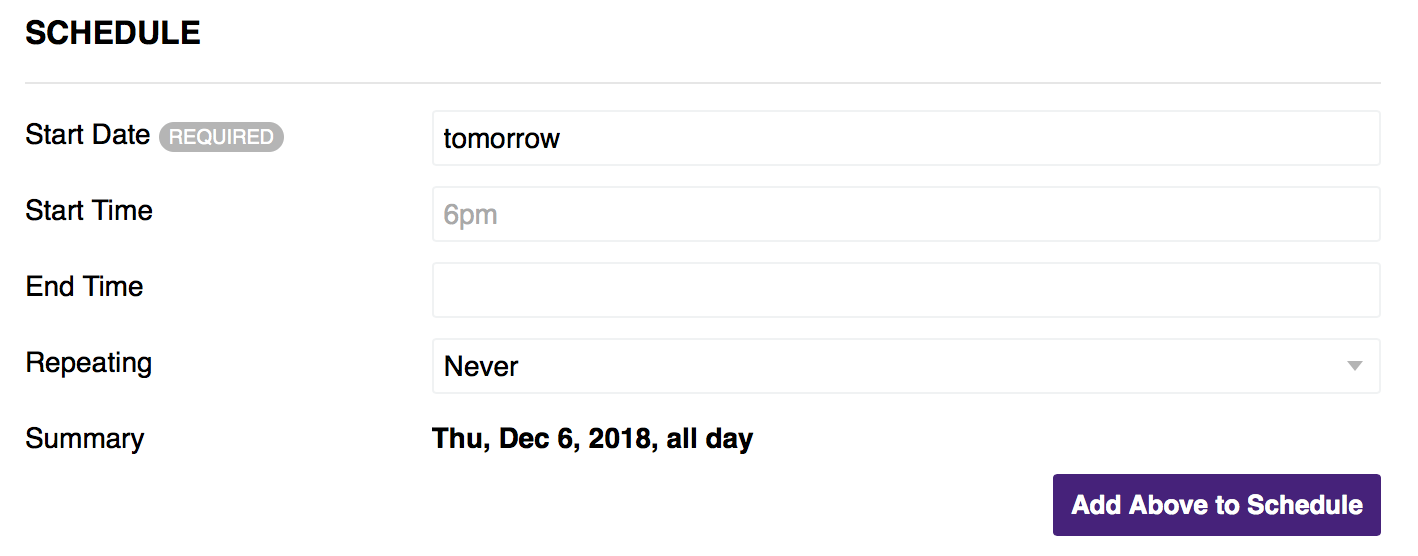
- Enter a date. This is a required field. You can enter the date several ways: Dec.
6, December 6, 12/06, next Thursday, tomorrow, etc. As you type, the summary will
update with the date. Please verify that it is correct before moving on.
- Enter start and end times for the event, if applicable.
- If the event will occur more than once, you can set it as a repeating event. Choose
from the drop-down menu of options for the frequency of recurrence.

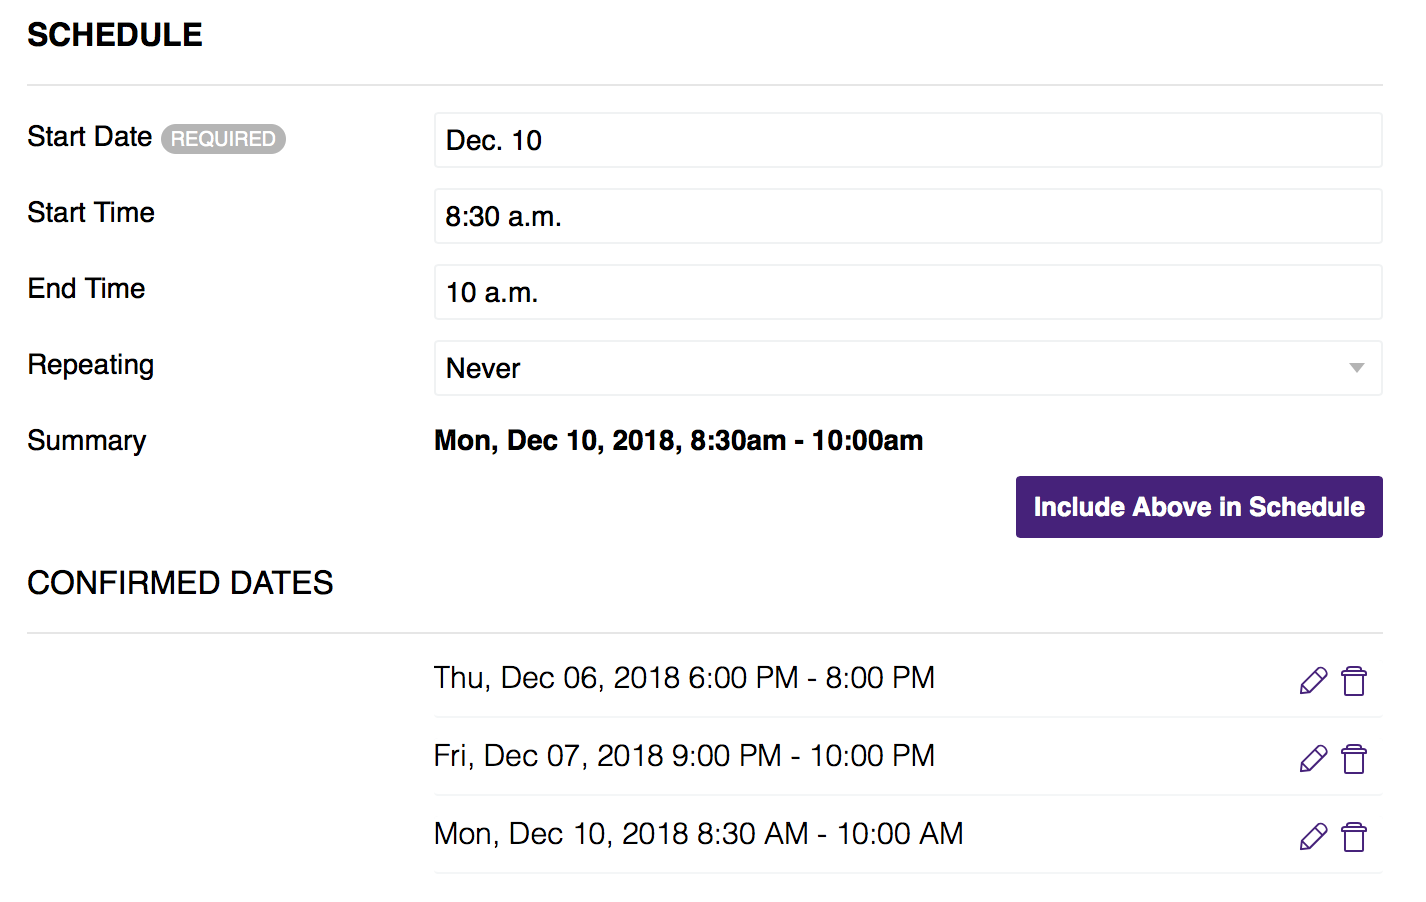
- If the event occurs more than once, but the schedule is irregular (does not fit one
of the drop-down options), you can create a schedule. Once you have input the date
and time of the first instance, click “Add Above to Schedule.” Continue, adding subsequent
instances until you are finished. This will create a schedule of confirmed dates.
Please verify that these are correct before moving on.
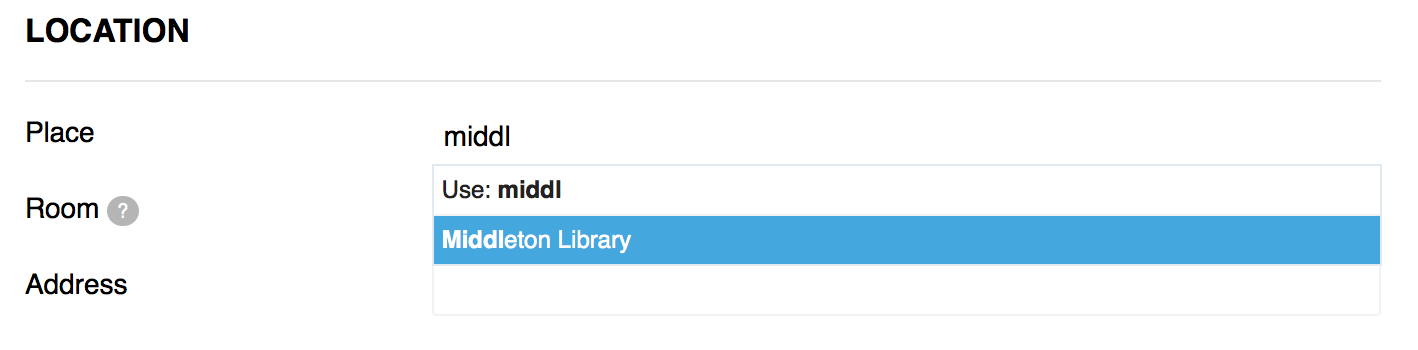
- Enter the event location. The majority of on-campus buildings and other locations
(such as the Quad) have been added in, and should pop up as a suggestion as you begin
typing. Please click on the suggestion once it appears. This allows an address to
auto-populate if applicable, and will allow users to access directions to the location.
If the location of your event does not appear as a suggestion, please check your spelling.
If it still does not appear, email lsucalendar@lsu.edu so we can add the location.
 Next, add a room, if applicable. Please note that this does not reserve the room for
your event. Please reserve the room through the appropriate channels before submitting
your event in Localist.
Next, add a room, if applicable. Please note that this does not reserve the room for
your event. Please reserve the room through the appropriate channels before submitting
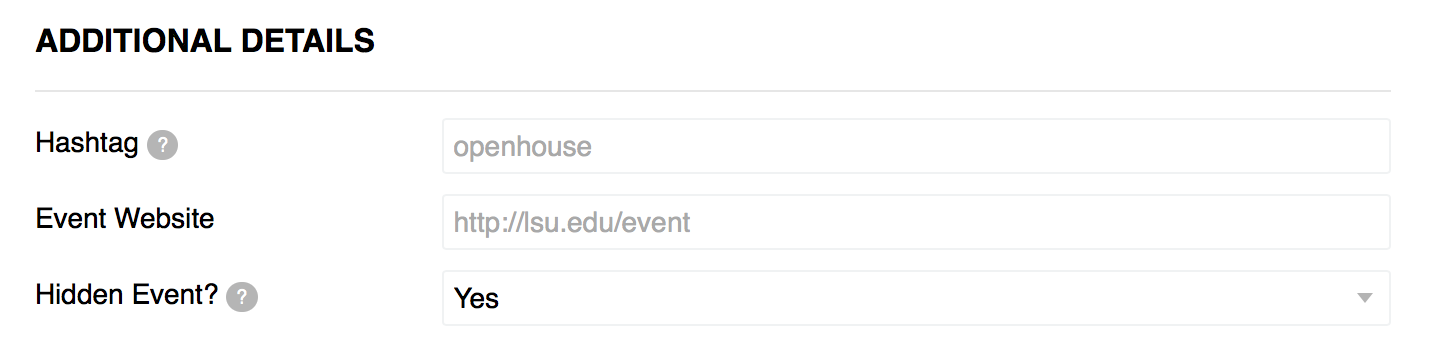
your event in Localist. - If your event has a dedicated hashtag on social media, add it in the hashtag field (the # will be added automatically).
- If there is a web page for the event, add it in the event website field.
- If your event is not open to the public and you are not promoting it, but LSU needs
to be aware of it for emergency management purpose, indicate that it should be a hidden
event. In the Additional Details section, next to Hidden Event, select “yes.” This
will allow high-level administrators and those with a direct link to view the event,
but it will not appear on the calendar.
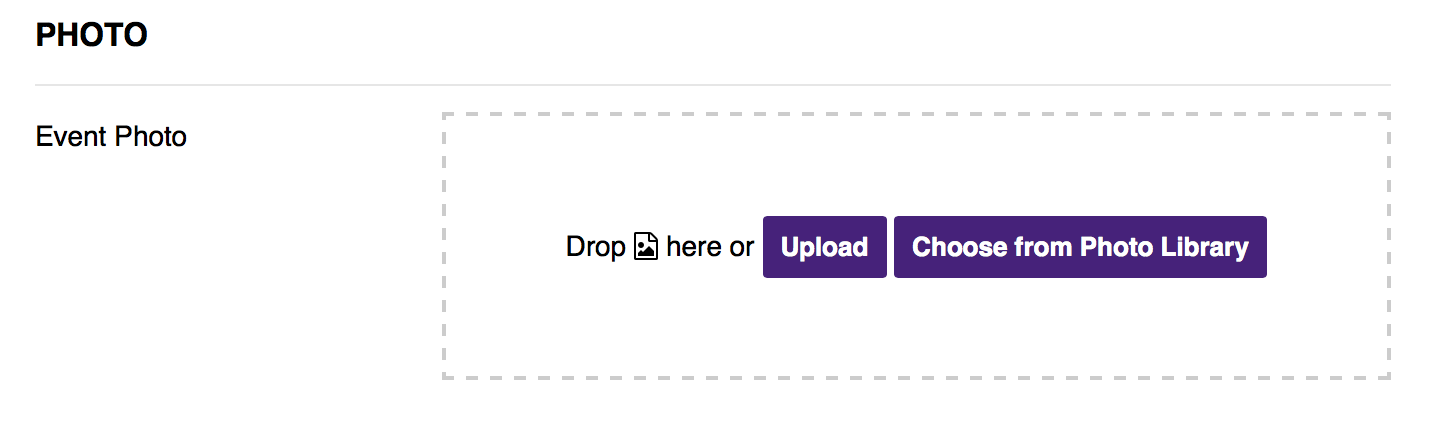
- All events in Localist are accompanied by a photo. If you have a photo specific to
your event, you can upload it. Otherwise, you can either choose a photo from the library
or leave it blank and a photo will be automatically added based on your event filters.
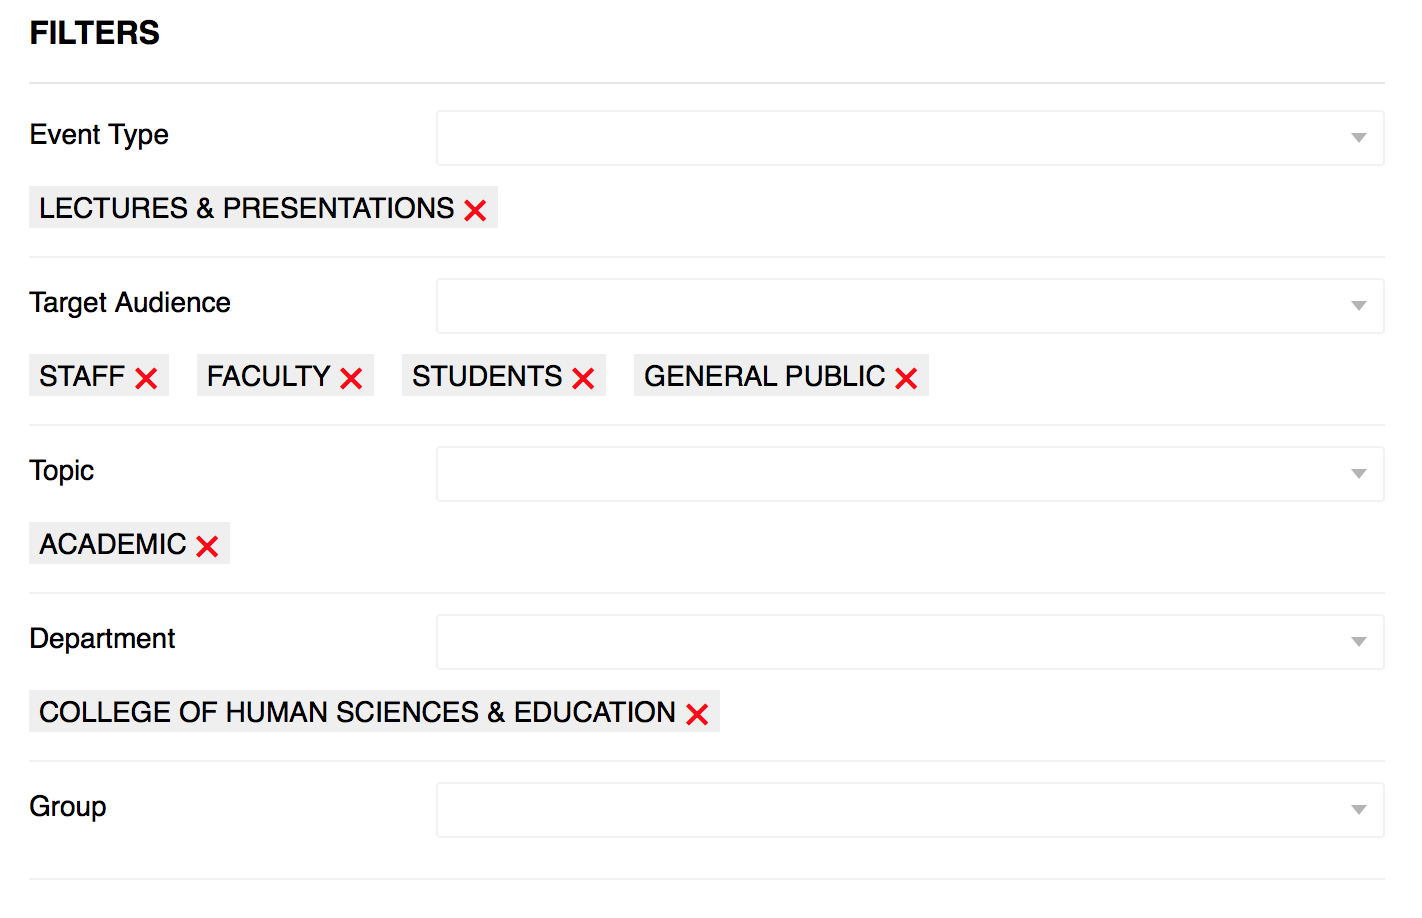
- Apply the relevant filters. Filter categories are Event Type, Target Audience, Topic,
Department, and Group. These help users find your event. It is recommended that you
include either a department or group and a target audience for each event. Add additional
filters as applicable. You can select more than one filter from each category.
- If you are selling tickets to your event, fill in the cost and add a link to purchase tickets. If the event is free but requires registration, add the link to register and either leave the cost field blank or write “free.” Both fields should be left blank if there is not registration for your event.
- Click “add event.” This will submit your event for moderation.
Editing Events
To easily access your submitted events, click “Dashboard” under the top drop-down menu while you are logged in

From your dashboard, you will be able to see your pending and live events. Click on the title of the event you want to edit to open it. You can also navigate to the event from the calendar home page.
You must be logged in to edit your event. You will see a button on the right side of the screen that says “edit event.”

Click on the button to open the editing view. This will take you to the same event submission form that you used to submit the event, with all the existing information filled in. Make any necessary edits, and then click “save event” at the bottom. This will submit your changes for moderation. You can make changes while an event is awaiting moderation, as well as once it is live.
![]()
If you want to delete the event, follow the steps above then click “delete event.” This will automatically delete the event. There is no approval required for this action.
Accessibility
All content entered into Localist must be ADA compliant. Please review the online accessibility requirements.